Projects
Concept
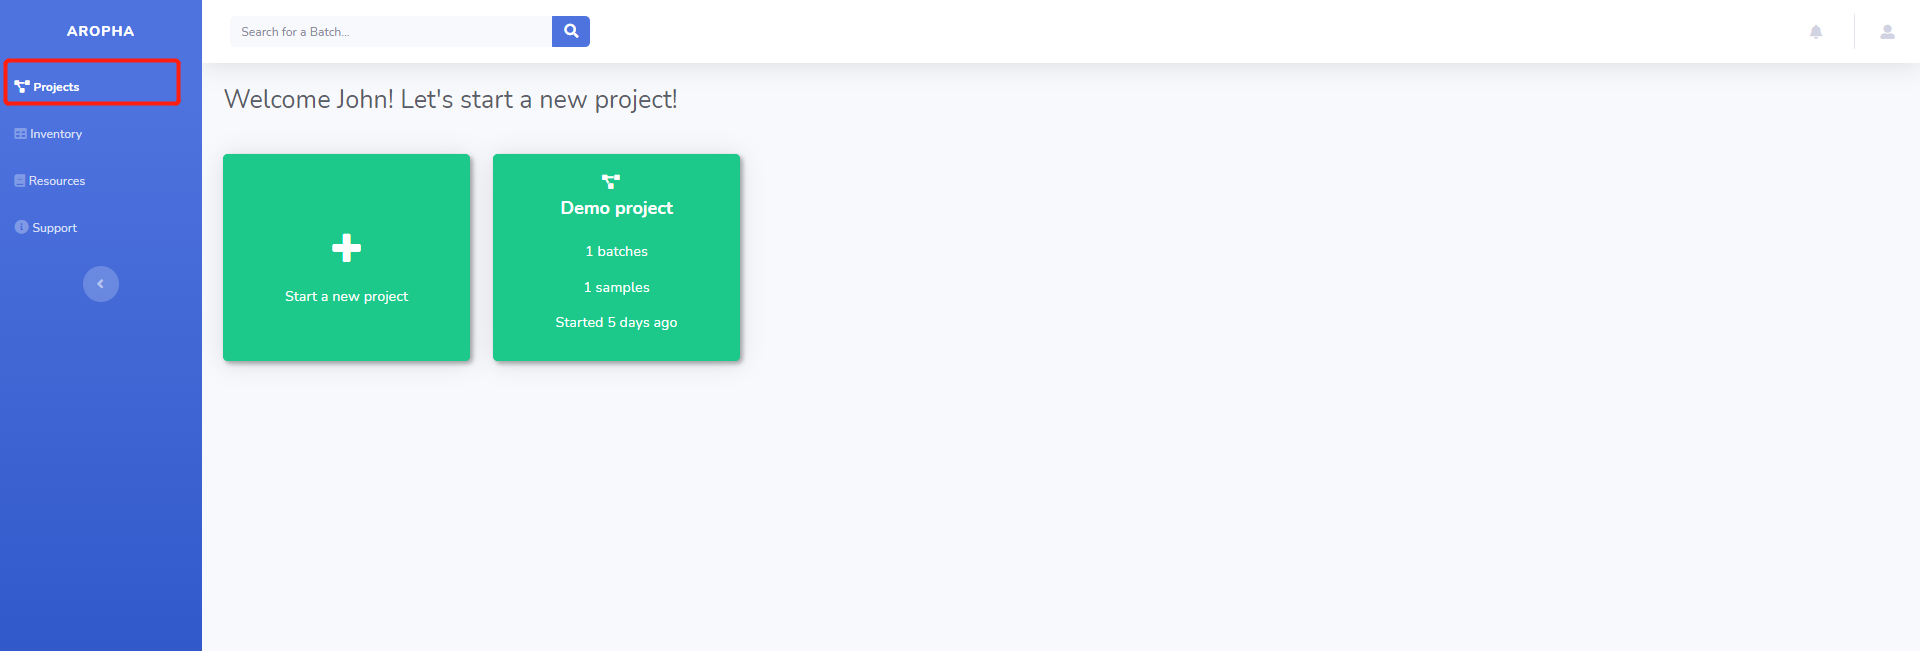
Projects are groups of batches, data, conversation threads and more of an organization with Aropha. You can create, edit, and view your projects through the user dashboard.
A project may correspond to a paper/publication, a particular trial or an isolated set of tests for a particular hypothesis.
tip
It is a good practice to include as many tests as you can in each project if they are similar to each other, so that the results of them can be easily compared later. However, it is completely up to you to decide how to split your work into projects.
Create a project
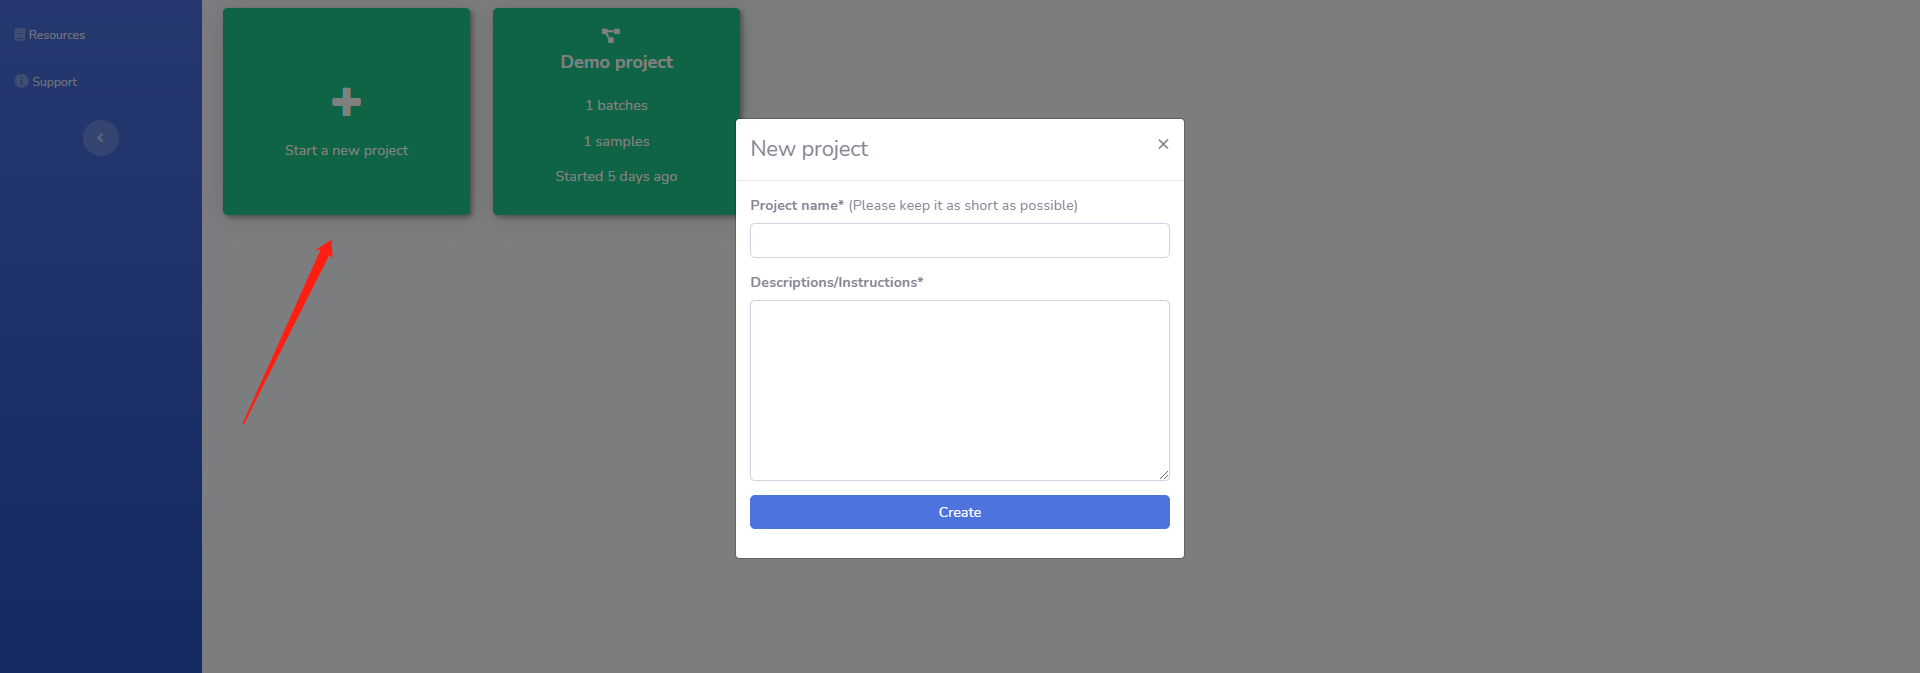
You can click on the Start a new project card to create a new project.
The only information you will need for this process is the name and descriptions/instructions for this project.
important
The project name has to be unique and as short as possible so that it can be properly displayed on the card.
Once you have entered all the information required, click on the button Create to create this project. After that, you will be able to see it on your dashboard as a project card.
Edit a project
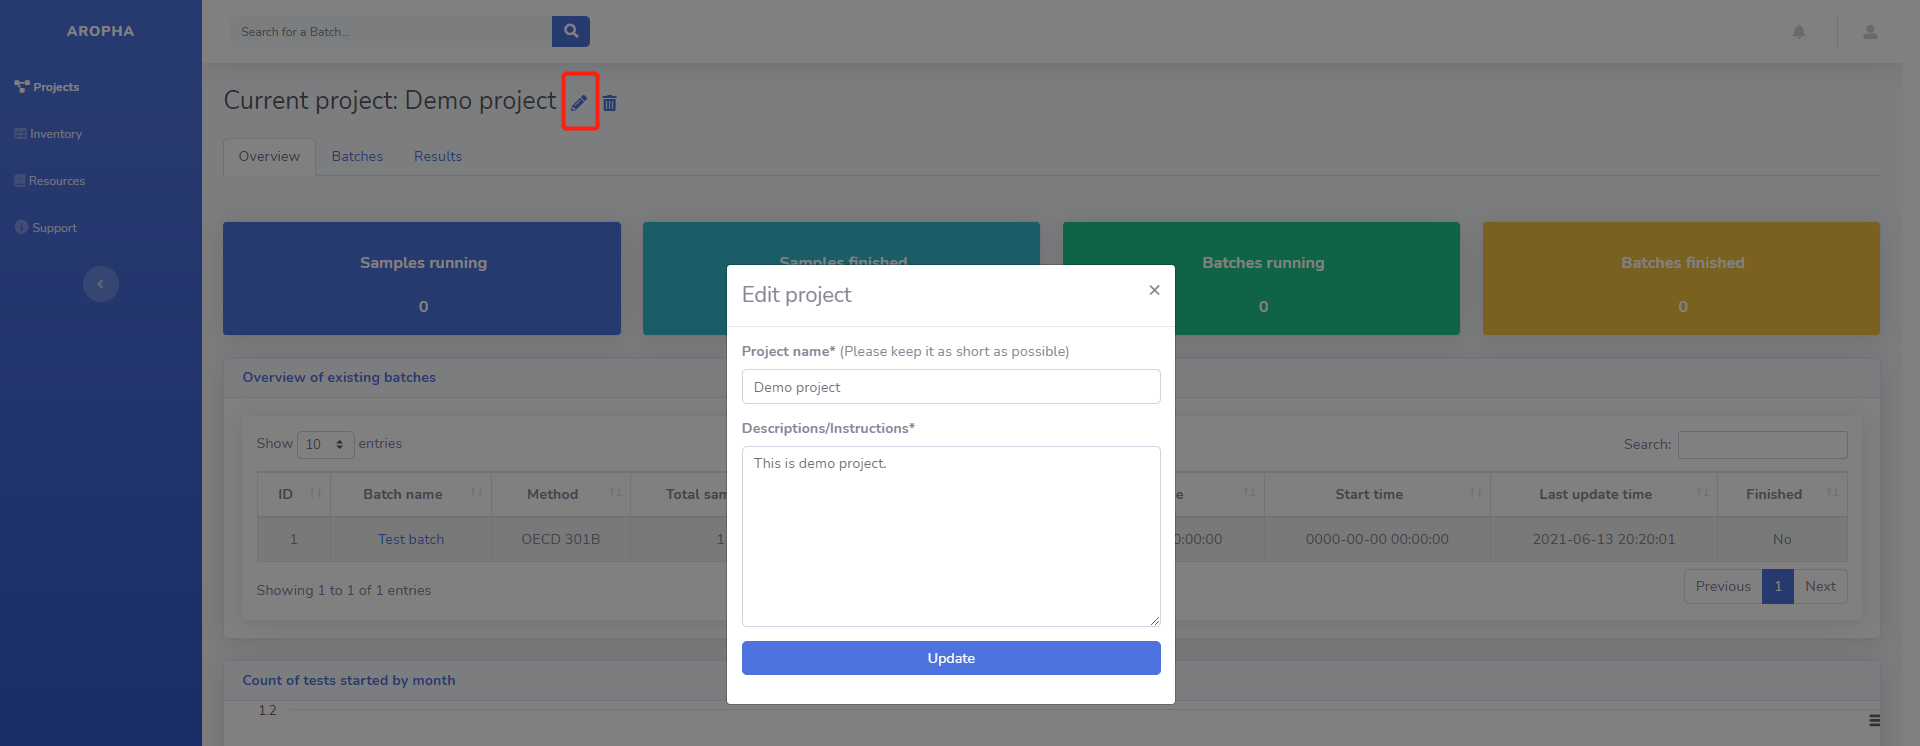
You can easily modify the information of a project including the name and the description/instructions.
To do that, please enter this project by clicking on its card.
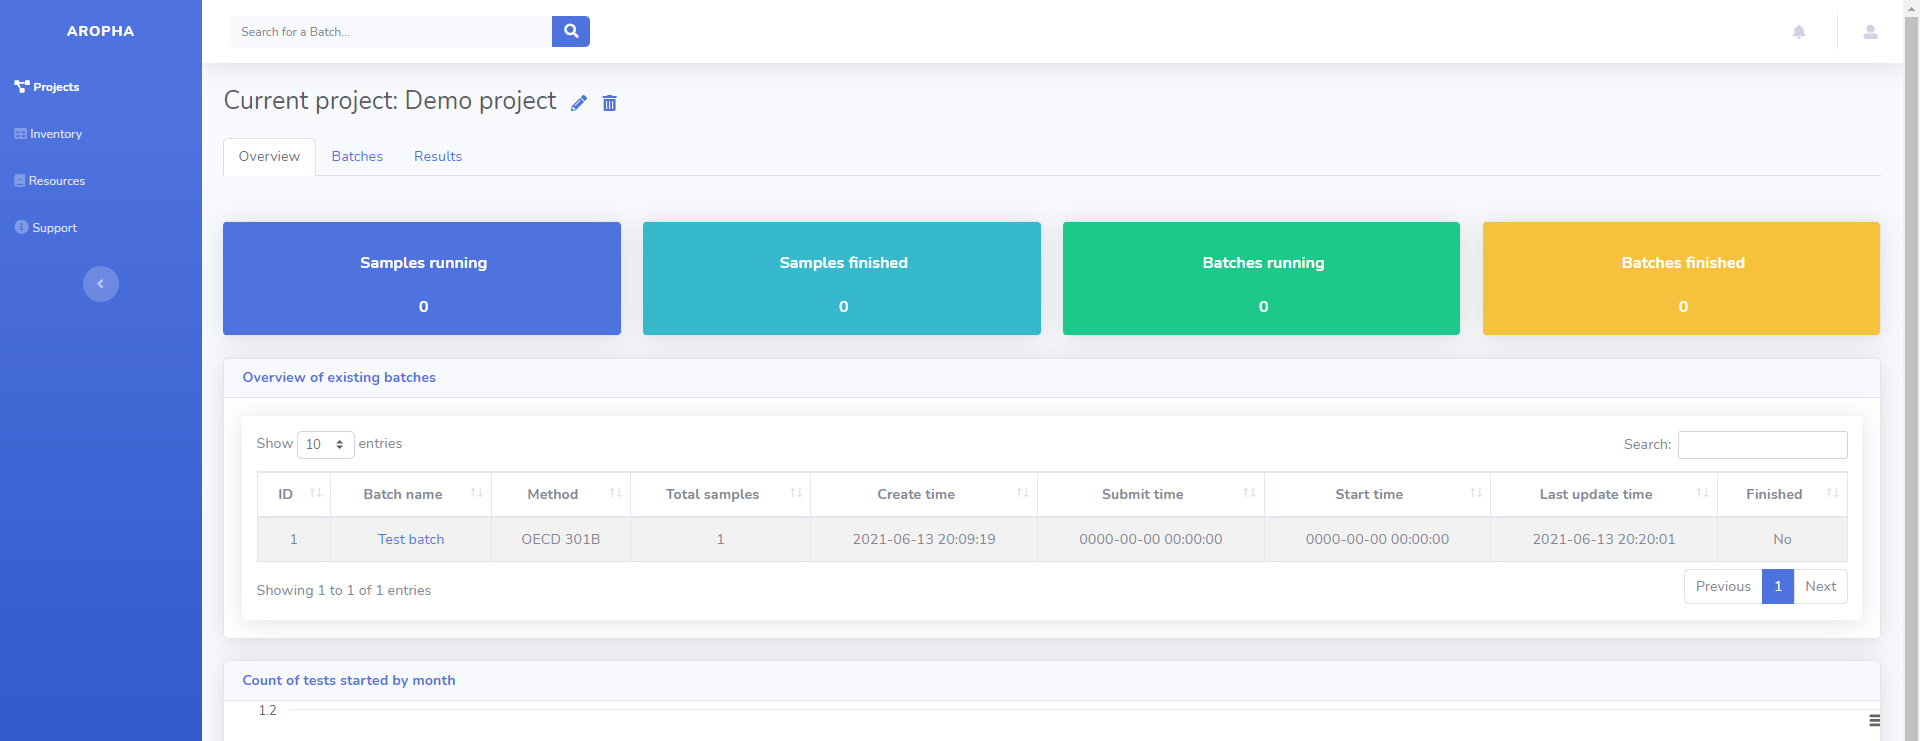
Then you can click on the pencil icon after the "Current project: ...".
The pop-up window is essentially the same as the one you used to create this project. Any information input here will be updated in our database.
Delete a project
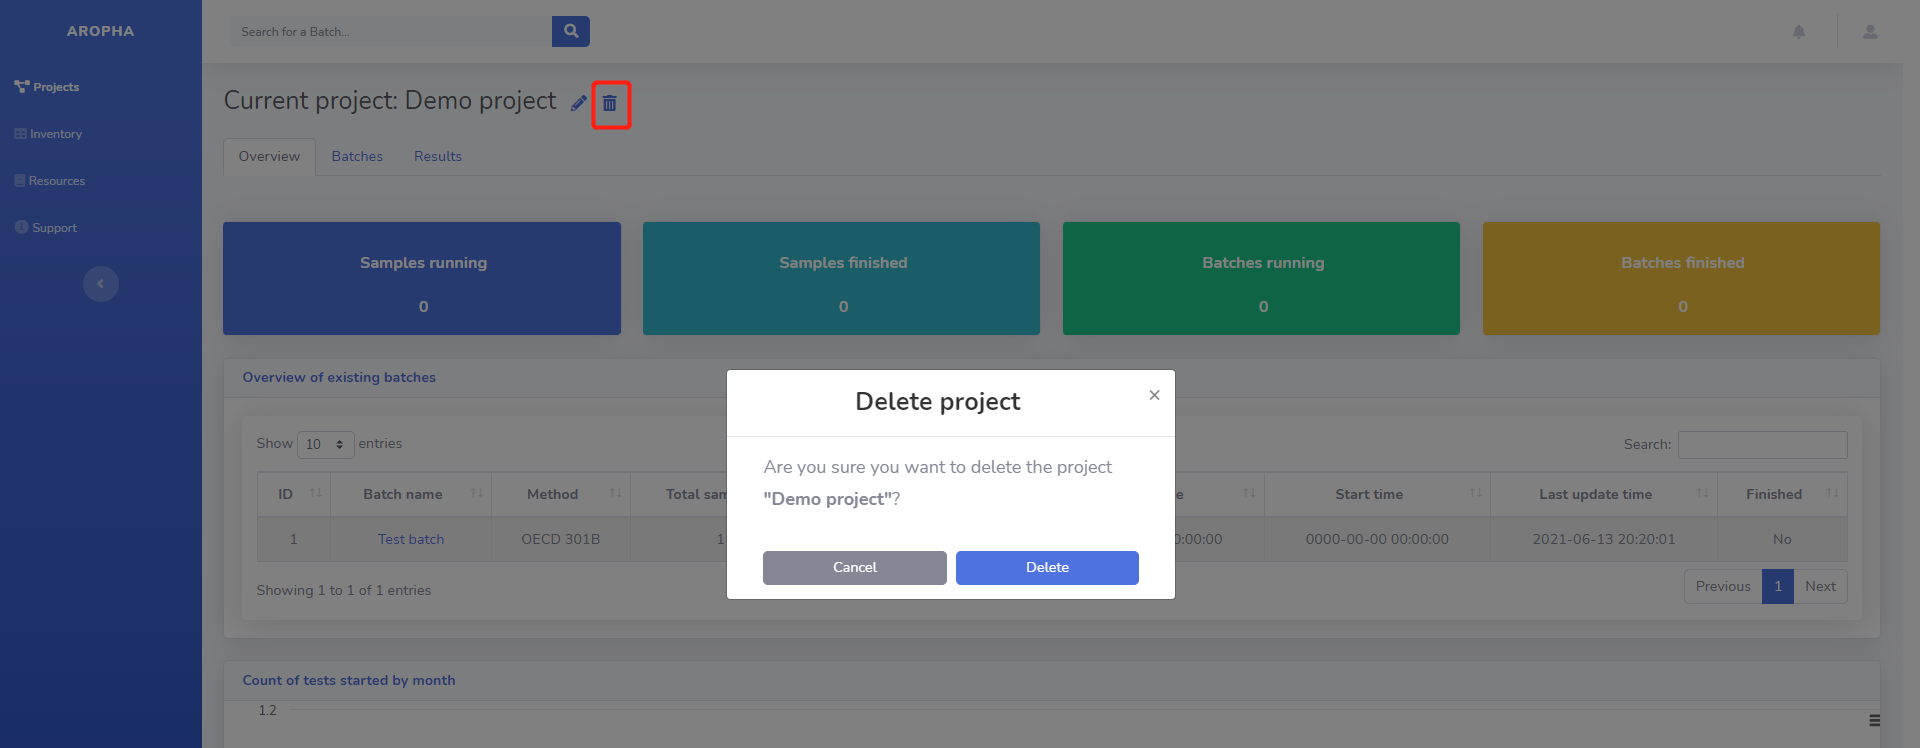
Sometimes you may want to create a random project in order to get familiar with this webapp, or you simply want to start over a project. In those cases, you can delete a project whenever you want as long as there are not any batches submitted for testing.
To do that, please enter this project by clicking on its card.
Then you can click on the Trash bin icon after the "Current project: ...".
The pop-up window will allow you confirm whether you want to delete the project or not.
View an existing project
Overview
In each project, you will have an overview of this project once you open it (under the "Overview" tab). The overview contains the samples and batches that are currently running and have been completed. You will also have an overview of the existing batches, and the count of sample tests started by month.
Batches
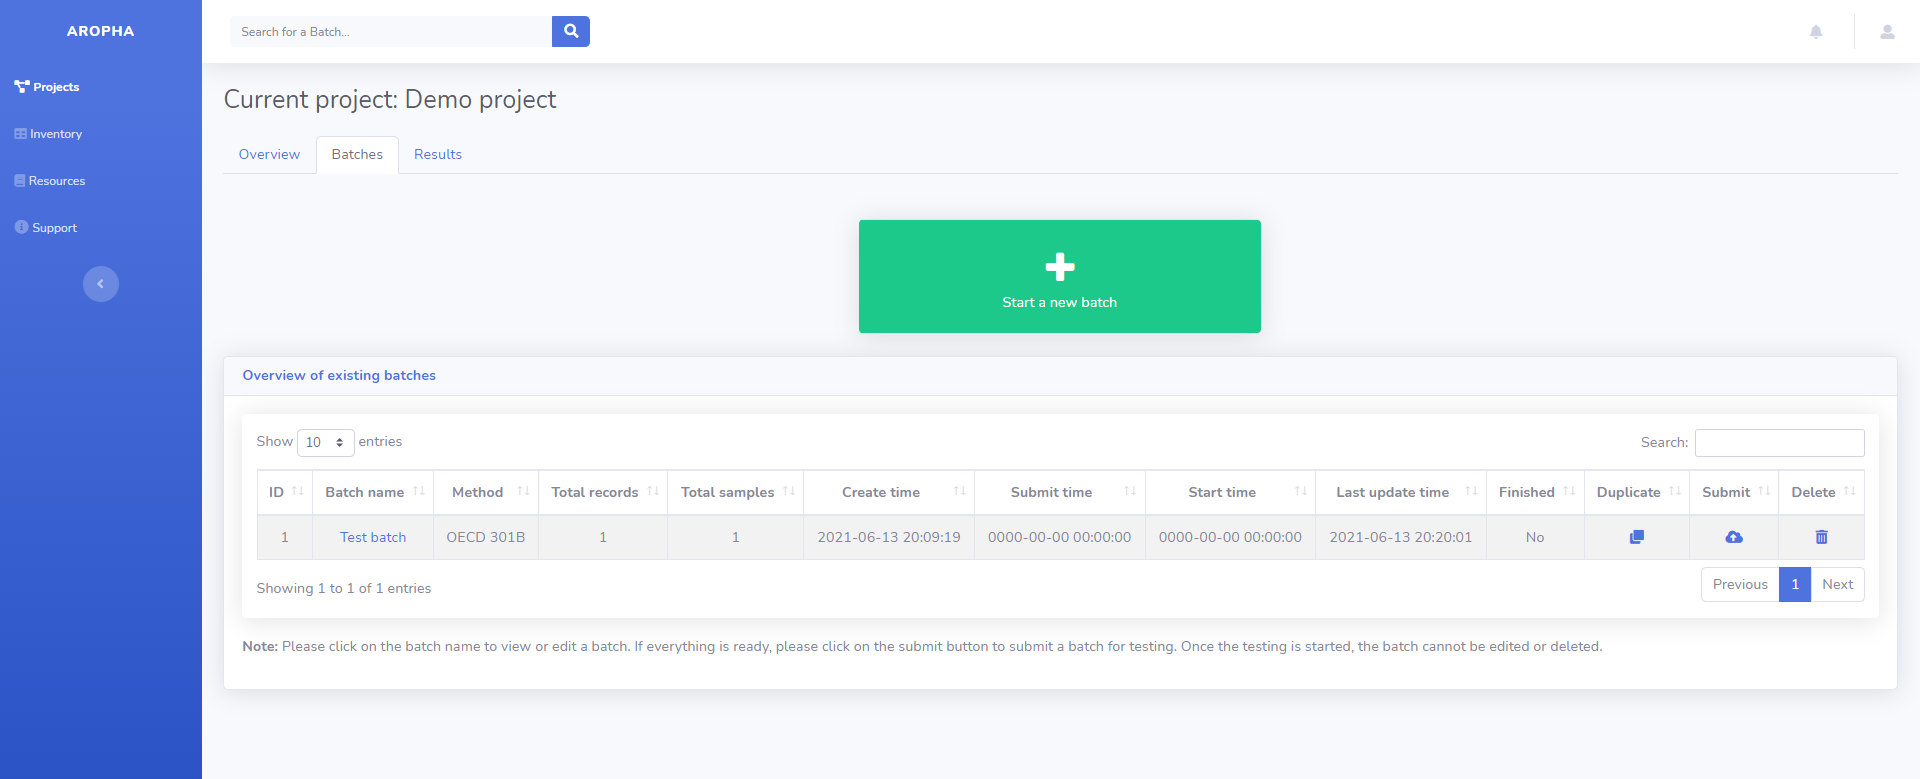
In each project, you can also click on the "Batches" tab to create, edit, delete, or submit different batches of runs anytime you want.
Details about how to set up a batch can be found in page "Create a batch".
Results
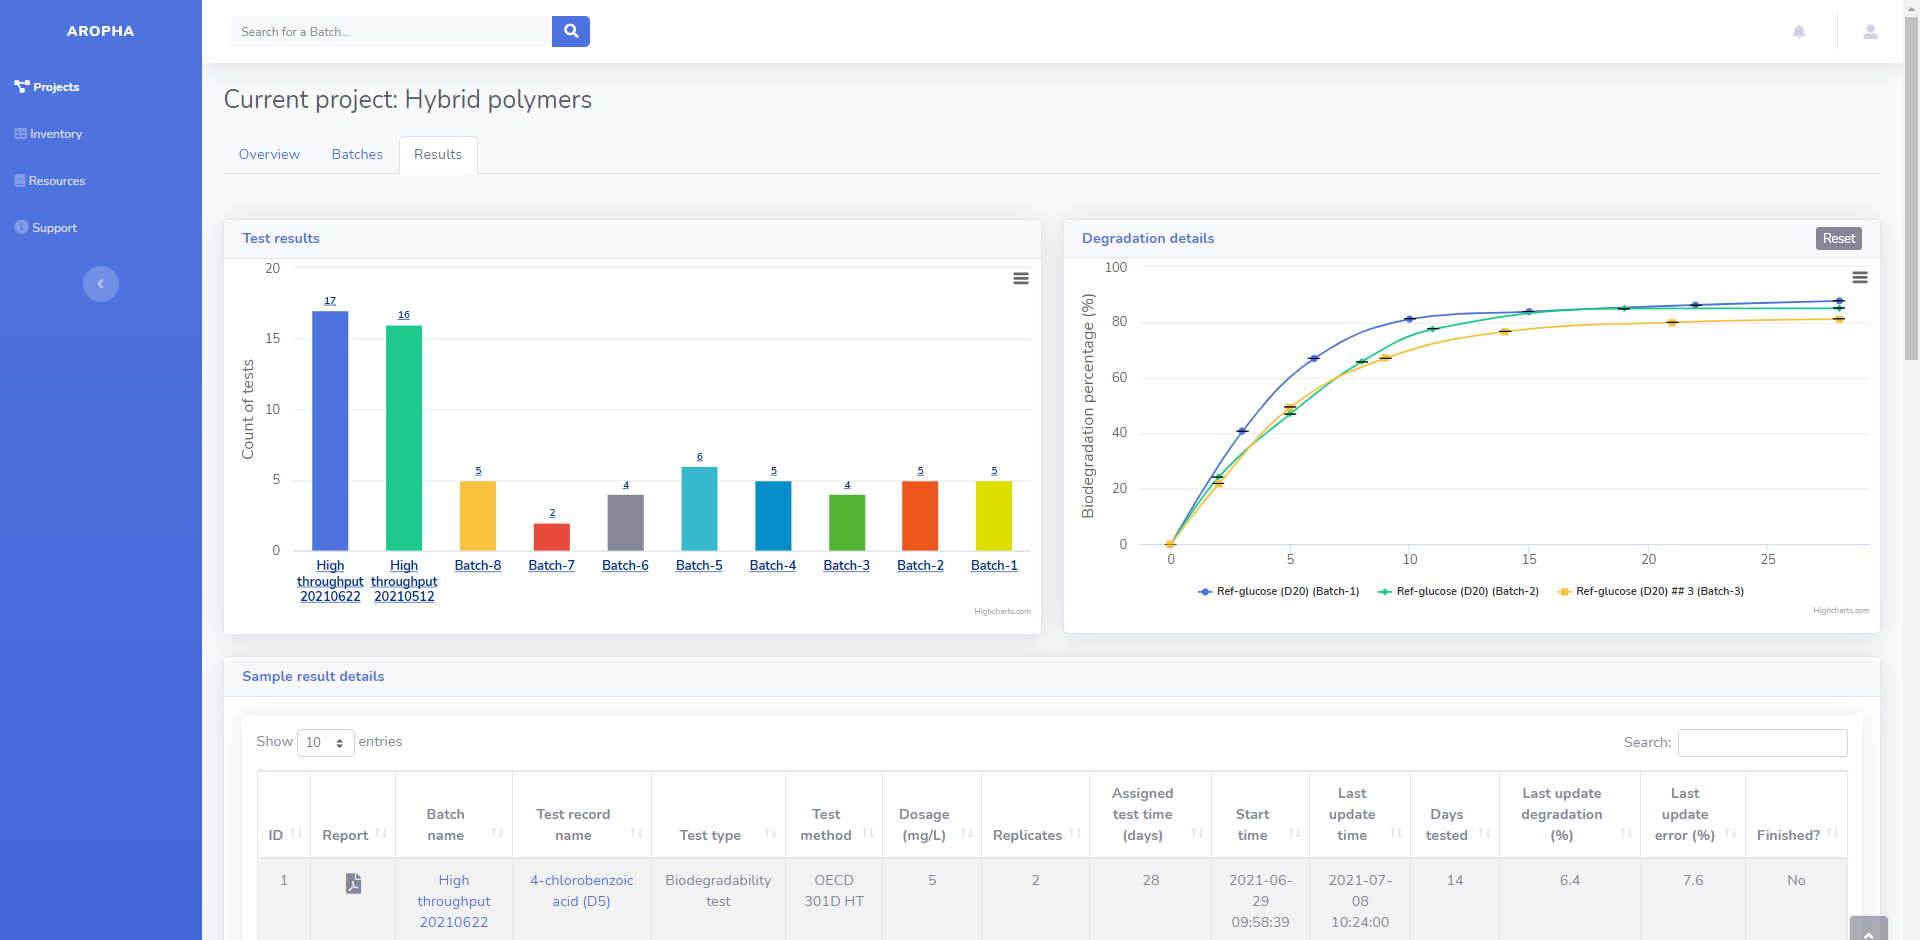
In addition, you can also access the results of each project by navigating to the "Results" tab. In this panel, you can display the results of a specific batch and click on each sample to show the detailed degradation curve on the right side.
Underneath the figures, you can also view the details of each sample in the table "Sample result details".
If the PDF report is ready, you can click on the PDF icon to download the report for a test.
Underneath this table, you will see another table called "Batch result details" about the details of each batch in the current project.
If the PDF report is ready, you can click on the PDF icon to download the report for the corresponding batch.
